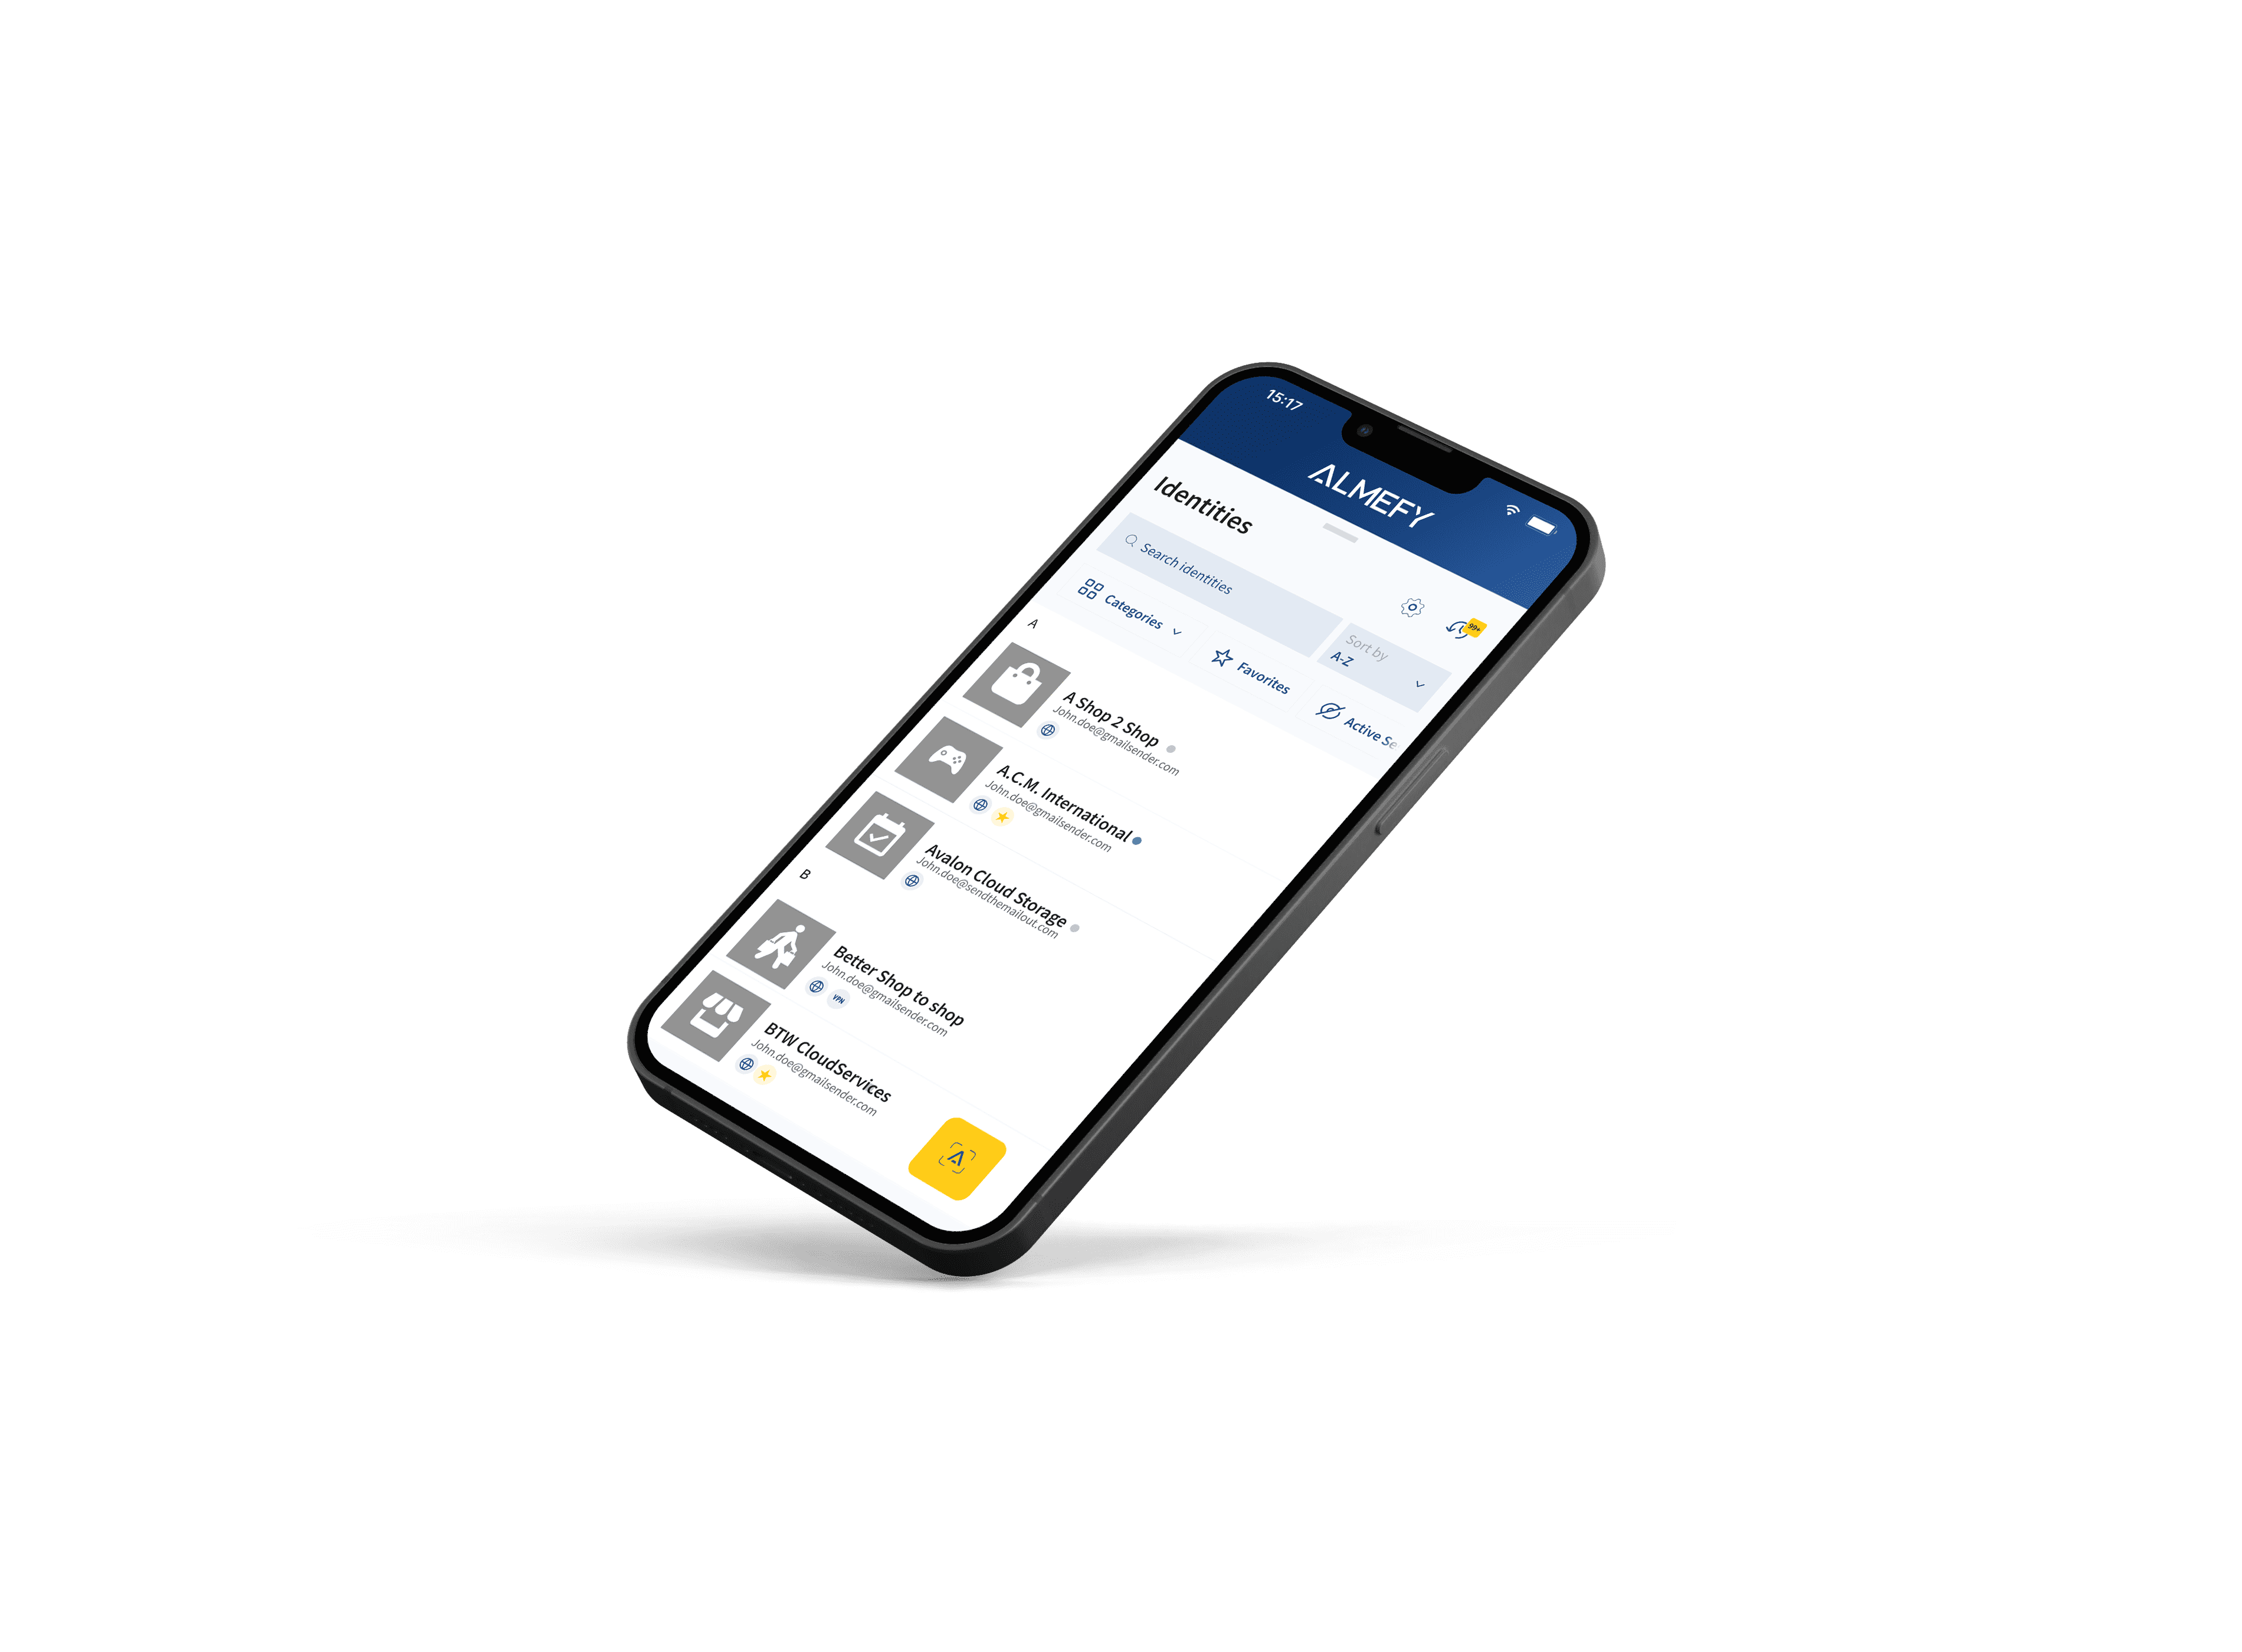
Office 365 SAML

This comprehensive guide is designed to assist you in integrating ALMEFY as your Identity Provider (IdP) for Office 365, utilising SAML 2.0, enabling Single Sign-On (SSO). We'll walk you through the necessary steps to ensure a seamless and secure setup. Please also refer to the Office 365 documentation for further details.

Prerequisites

  • Admin access to your ALMEFY Hub at \<subdomain>.hub.almefy.com
  • Administrative access to your Office 365 account.
  • PowerShell with the Microsoft Graph PowerShell module installed.
  • Access to your domain's DNS settings to make necessary entries.

Setup Overview

We try our best to keep these guides updated but can not anticipate when platforms might update interfaces, or change available options for configuring SSO.

Though setting up ALMEFY as your IdP generally follows the same steps for all platforms.

  1. Configure Endpoint – Set up the specific details of your endpoint in the ALMEFY Hub.
  2. Configure Platform – Adjust your platform’s settings for compatibility with the ALMEFY endpoint.
  3. Copy Metadata – Transfer the necessary metadata from your platform to the ALMEFY Hub for secure integration.

Each step corresponds to the options in the left column of the ALMEFY Hub interface.
If you find any inconsistencies in this guide, please let us know via our contact form.

Setup

Please note: the steps in the left column of the Endpoint Creation screen in the ALMEFY Hub correspond to the same as in this guide.

Step 1. ALMEFY SSO Endpoint Configuration

  1. Create a new Endpoint in the ALMEFY Hub by clicking the Add Endpoint button in the top right of the Endpoints page.
  2. Select the Office 365 Preset
  3. (Optional) Rename the endpoint and the endpoint id if you do not want to use the default.
  4. Press the Generate Certificate & Private Key button or paste your own into the textboxes.
  5. Keep the endpoint configuration options open and continue with Step 2.

    Step 2. Office 365 Configuration

More details can be found in the Office 365 documentation.

2.1 Install the Microsoft Graph PowerShell SDK

You can find official installation instructions by Microsoft [here](https://learn.microsoft.com/en-us/powershell/microsoftgraph/installation?view=graph-powershell-1.0.

  1. Open the windows PowerShell

  2. Update PowerShellGet to the latest version using 

    Install-Module PowerShellGet
  3. The PowerShell script execution policy must be set to remote signed or less restrictive.
    For example:

    Set-ExecutionPolicy -ExecutionPolicy RemoteSigned -Scope CurrentUser
  4. Install the module

# For current user only
Install-Module Microsoft.Graph -Scope CurrentUser

# For all users on the machine (Requires to start PowerShell as Admin)
Install-Module Microsoft.Graph -Scope AllUsers

2.2 Configuring a domain for federation

You can't federate the default domain that is provided by Microsoft that ends with onmicrosoft.com, so you will have to setup your own.

  1. Go to the Microsoft 365 admin center.
  2. Go to the Settings > Domains page.
  3. Select Add domain.
  4. You can use a TXT record to verify your domain. Select this and select Next to see instructions for how to add this DNS record to your registrar's website. This can take up to 30 minutes to verify after you've added the record.
  5. Verify domain ownership through the Office 365 admin center.

Domains Configuration

  1. Connect to your Microsoft Entra Directory as a tenant administrator. In your PowerShell:
Connect-MgGraph -Scopes "Domain.ReadWrite.All", "Directory.ReadWrite.All","Directory.AccessAsUser.All"
  1. Your browser will open. Login with your admin account and grant access to Microsoft Graph Command Line Tools. The PowerShell should output:
Welcome to Microsoft Graph!

Connected via delegated access using <id>
Readme: https://aka.ms/graph/sdk/powershell
SDK Docs: https://aka.ms/graph/sdk/powershell/docs
API Docs: https://aka.ms/graph/docs
  1. Configure your desired Microsoft 365 domain to use federation with SAML 2.0:
# The domain you configured earlier.
$Domain = "<your_sso_domain.com>"
# Copy and paste `SSO` from the ALMEFY Hub configuration Step 2.
$LogOnUrl = "https://<subdomain>.almefy.com/saml20/sso/<endpointId>" 
# Copy and paste `SLO URL` from the ALMEFY Hub configuration Step 2.
$LogOffUrl = "https://<subdomain>.sso.almefy.com/saml20/slo/<endpointId>" 

# Use the default issuer URL or define your own here AND in the ALMEFY Hub Step 3. section of the Endpoint Configuration.
$MyUri = "https://<subdomain>.sso.almefy.com" # This is the default
# Copy and paste `Certificate` from the ALMEFY Hub configuration Step 2.
$MySigningCert = "MIID ..... mtqqm6YhUw=="
$Protocol = "saml"
$FederatedIdpMfaBehavior = "enforceMfaByFederatedIdp"

New-MgDomainFederationConfiguration `
  -DomainId $Domain `
  -IssuerUri $MyUri `
  -FederatedIdpMfaBehavior $FederatedIdpMfaBehavior `
  -PassiveSignInUri $LogOnUrl `
  -PreferredAuthenticationProtocol $Protocol `
  -SignOutUri $LogOffUrl `
  -SigningCertificate $MySigningCert
  1. Next we create an user to test our login
$Password =  "KHJASdbmnasdug123123.!!1"
$PasswordProfile = @{ Password = "$Password" }

New-MgUser `
  -UserPrincipalName "test.user@<your_sso_domain>" `
  -DisplayName "Max" `
  -GivenName "Max" `
  -Surname "Mustermann" `
  -AccountEnabled `
  -MailNickName 'max' `
  -OnPremisesImmutableId "test.user@<your_sso_domain>" `
  -PasswordProfile $PasswordProfile `
  -UsageLocation "DE"

Step 3. Copy Office 365 Metadata

  1. Back in the ALMEFY Hub, we pre-filled all the information required by Microsoft for you. The Step 3. section shows you the relevant information. They are provided by Microsoft in this document.
  2. Hit save and you are done!

Test & Troubleshoot

To ensure that ALMEFY has been correctly set up as your Identity Provider (IdP), you can test the login in two ways:

  1. Platform Login Page: Visit Office 365s login page and check if the ALMEFY Login option is visible and functional by clicking on it and scanning the ALMEFY QR Code with the ALMEFY App.
  2. ALMEFY SSO Page: Go to <subdomain>.sso.almefy.com, sign in with the ALMEFY App, and choose your newly enabled endpoint to test the authentication process.

If you encounter any issues:

  • Review this guide to make sure all steps were followed correctly.
  • Consult the Office 365 documentation for specific setup and troubleshooting instructions.
  • Try to contact Microsoft support and see if your issue can be resolved.
  • If you still need help, please fill out our contact form for support.

Conclusion

Congratulations on successfully setting up SAML 2.0 authentication with ALMEFY as your Identity Provider! You are now equipped to offer users a secure and convenient single sign-on experience.