This guide will help you with the basics of integrating ALMEFY as a Single Sign-On (SSO) provider using the SAML 2.0 (Security Assertion Markup Language) standard on platforms that support it.
This process involves creating a SAML Endpoint in the ALMEFY Hub. Endpoints act as connectors between ALMEFY and your platforms like Salesforce, Office 365 or WordPress.
SAML is an open standard implemented in a variety of platforms for which we do not have tailored guides yet. Since the SAML authentication process is standardized, this guide should provide what you need to get started.
Prerequisites
- Admin access to your platform.
- Ensure the platform supports SAML authentication.
- An active Almefy account with admin access to
https://<company>.hub.almefy.com.
2: This information can be typically found on the platforms product page, it's documentation pages or somewhere in the admin settings under "Authentication", "Login" or "Single Sign-On (SSO)".
Setup
The steps in this guide correspond to the steps in left column of the ALMEFY Hub endpoint configuration.
- Configure Endpoint
- Configure Platform
- Copy metadata provided by the platform.
Step 1: Create and Configure Endpoint in ALMEFY Hub
-
Log in to your Almefy Hub account at
https://<subdomain>.hub.almefy.com. -
In the Almefy Hub dashboard, navigate to the "Endpoints" section.
-
Click on "Add Endpoint."
-
Select "SAML Endpoint."
-
Fill in the required information:
At minimum, a SAML Endpoint requires:
Name
Used to identify the platform. Choose a name users will easily recognize.
Endpoint ID
A unique identifier for this endpoint you will later enter in the platforms settings.
Endpoint URI
In order to initiate the login flow from the ALMEFY SSO page a starting point is required.
The SAML authentication flow allows starting on either the IdPs (Identity Provider) page, or on the platforms login page. If you are unsure which to choose, leave the default value and check if it works later.
If you know which URI to put, select "Set custom Endpoint URI".
You can find your ALMEFY SSO page at
https://<subdomain>.sso.almefy.com.
Private Key & Certificate
A private key and a X.509 certificate are required to establish a secure connection between ALMEFY and your platforms authentication hooks.
You may provide your own or select "Generate Certificate & Private Key" to let ALMEFY generate them for you.
Optional Settings
You may open the optional section and adjust additional settings such as session lifetimes and access requirements.
- Move on to the next step before saving the new endpoint.
Step 2: Configure Your Platform
-
Keep the ALMEFY Hub open and log in to your platform's admin dashboard.
-
Locate and access the settings or authentication section on your platform.
-
Look for an option to configure SSO or SAML authentication.
-
The SAML settings on your platform will require you to copy some settings and URIs provided in
Step 2.in the ALMEFY Hub. Click the copy buttons to copy the contents to your clipboard and paste them into your platform settings. The available fields are further described in the ALMEFY Hub.
If you find your platform to require metadata that is currently not yet provided or supported by ALMEFY contact our support for further assistance.
Step 3: Copy Configuration from your Platform
- Your platform should now also provide a set of links that are required by the step 3 section in the ALMEFY Hub. Copy these over.
ACS URL
Required
The 'Assertion Consumer Service URL' designates the endpoint where the Service Provider receives and processes SAML assertions.
Issuer
Required
Represents the unique identifier of the Service Provider in SAML transactions.
Recipient
Required
Specifies the intended recipient of a SAML assertion, ensuring secure delivery to the correct endpoint.
SLO URL
Optional
Identifies the endpoint for initiating and handling Single Logout requests and responses.
Audience
Optional
Defines the intended audience that the SAML assertion is meant for, ensuring it is directed to and used by the correct entity.
- Confirm and save the settings in both the ALMEFY Hub as well as your platofrms OIDC settings page.
Step 4: Test SAML Login
You will have to assign your new Endpoint to a group and add your user to that group as well, to make sure you can test the login.
-
Visit your platform's login page.
-
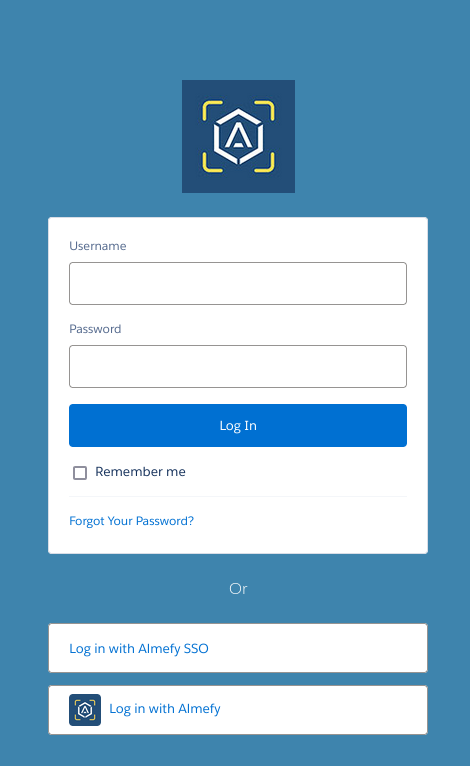
You will now see the "Login with Almefy" or "Login with SAML" button.
- Example:

- Example:
-
Click "Login with Almefy" or "Login with SAML" to initiate the SAML authentication process.
-
You will be redirected to an Almefy SSO page, which contains the Almefy Login QR Code.
-
Scan the code using the Almefy App.
Ensure you have enrolled your device before attempting to log in. You can do so by managing your user in the Almefy Hub > Users > Settings section.
- Once authenticated, you will be redirected back to your platform, logged in automatically.
Troubleshooting
If you encounter any issues during the setup, please follow these steps:
-
Refer to your platform's documentation: Check your platform's official documentation for troubleshooting guidance related to SAML authentication or SSO configuration.
-
Contact your platform's support team: Reach out to your platform's support team for platform-specific assistance and troubleshooting. They can provide guidance tailored to your platform's setup.
-
Almefy Support: If you're unable to resolve the issue with your platform's documentation and support, don't hesitate to seek help from the Almefy support team. We're here to assist you in configuring SAML authentication with Almefy as the identity provider.
Contact Almefy Support: Reach out to us via our contact form for assistance with SAML setup issues. Please provide detailed information about the problem you're facing, and our support team will be happy to assist you.
Conclusion
Congratulations! You've successfully set up SAML authentication for your platform using Almefy as the identity provider. Your users can now enjoy secure and convenient single sign-on.
